Material gathering took a different tack this time around. Rather than the 18', 18" wide clear old growth pine we bought for stripping the form, the stations began with repurposed plywood. Kijiji provided a seller with 25"x36" , 3/4" ply sheets for $1 each. $20 for enough and some left over is a great deal, and as its older ply the veneers are actually nice and tight, with few voids. Things really were better in the old days! Well, at least the trees were bigger.... Apparently they had been headboards at a women's shelter, hence the varnish on one side. Having served a noble cause, seems a fitting end they become our form.
Here they are roughed out.

Paired up since the canoe is of course symmetrical - single centre station.

Lots and lots of scrap.

More scrap

Sanded and faired, almost done

Full set, next to reduce them since the lines are taken on the outside of the boat. Need to remove material for canvas, planking, ribs, metal on form, and sheathing (strips) on the form. Close to 1.5" all together

All the scrap from 15 stations. Burn baby burn.

Keep that dust down. Essential equipment.....

One other essential. Dont know why the photo flipped, try to fix it later.

Next up, backbone and mounting and ends, before stripping and metal bands.
Also need to build stem form.
Stay tuned....

LVL for backbone, nice and straight and rigid, no need to make a box beam.

Getting anxious!

Lots of tumblehome evident in the early designs.

Reduction lines for form and boat material

More cutting and sanding before mounting and stripping.
Stems and stem forms next

Back to our lines for the bow section ahead of station #3.

Our repurposed plywood fell short of our needs by 1.5" overall and 1" in height. Off to the store tomorrow to buy a half sheet of 3/4" ply. Once its cut out, it will be reduced for the canvas , planking along the flat surface, and stem thickness.

Better fit

GIS or good one side, nice to draw on and generally better quality, even if its for building houses and not boats....

Sheet will produce both ends, and one side of stem form

Ends cut and screwed together waiting to be sanded

One half of stem form, to be reduced and cleats added.

Work on the cruiser form was halted for work on a concrete form. Long story short the adjoining property had been renovated prior to ours and the neighbours purchase and the grade altered to dump rain and melt water on our property.

No more water in the garage in spring, a sidewalk is next and along with the retaining wall will divert water to the front of the property where it should go.

A different kind of form...

Weapon of choice.

Woodworking tools gave way to landscaping tools.
Just the sidewalk pour is left, then back to the form!
A new Cruiser for spring/summer!!!

Outside work is done, just in time for the snow that keeps trying to accumulate. Back inside, first step is to cleat the LVL in preparation for stations. Rob is always willing to lend the third hand and sometimes even brings donuts.

Ready for stations

Starting at the centre and working out, truing and checking.

End of a great day's progress. Trued, fit and stood off.

Just waiting for ends.

Trued up, a spool of dacron bow string provides a good reference line.

Clamped and predrilled once set.

Squared and blocked off.

First end on.

Next is trim LVL end so gunwale backers will clear, and set the end cleats after the backers are pre bent.

Sweet shape! Looks like we got the lofting right.

Next up is the other end.

Another long view.

When both ends are on and gunwale backer set, stations need to be doubled and ready for stripping before steel clench bands can go on.
Its coming along!!

Bracing all in place, and form is rigid.

Next is covering it with strips of pine, fairing and steel bands. Gunwhale backers to go on after bending as well.

While rearranging the workshop to get at wood and make space, the cruiser did some time outside.

Always enjoy its shape, and it will be used as a reference more as we get closer to completion on the form and closer to building.

Big old pine for strips, full length and selecting knot free stock will make fairing easier.

Lots of clear stock in these boards, relatively few and small knots

At 18' long and 18" wide you dont get this at the big box stores!

Full length strips millled.

ready to go on after doublers

Bracing done, next is stripping and fairing, then metal bands.

Before stripping the hull, the plywood stations need to be doubled with solid wood to give the screws something to bite into. Edge grain plywood will just split and screws will pull out as strips are drawn in to the curves

Pine glued and screwed to stations, heading to ends and waiting to be beveled

One end done

Center section doubled both sides, heading to the other end doublers are on the sides closest to the end for beveling, and will not change shape of the hull

Ad from 1911

Looks like we got the shape right, nice fine and hollow entry

Long shot from end back to centre

Form is carried to the ends, for full size cants and to ensure entry is kept fine

Transition from bow to centre with tumblehome kept
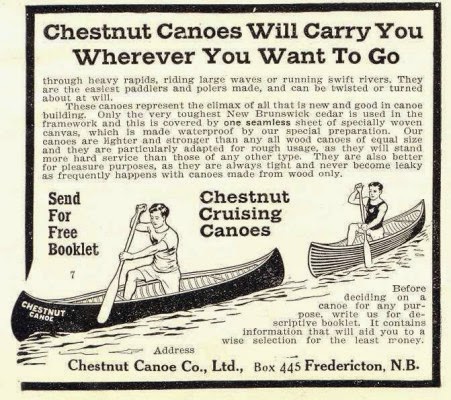
Sent for booklet, wonder if it will arrive....
1 comment:
Your LVL for a backbone on the form is something I've never come across. What is it? Obviously stiff enough to hold the sections in place. RLM
Post a Comment